티스토리 뷰
navermaps.github.io/ios-map-sdk/guide-ko/2-1.html
2021년 3월 28일에 작성된 글입니다.
아직 네이버지도는 SwiftUI를 지원하지 않아서, 내가 UIViewRepresentable을 사용해서 만들어줘야한다.
1. 기본 설정
import Combine
import NMapsMap
import SwiftUI
import UIKit

struct MapScene: View {
  var body: some View {
      MapView()
    }
  }
}

struct MapView: UIViewRepresentable {
  @ObservedObject var viewModel = MapSceneViewModel()
  func makeUIView(context: Context) -> NMFNaverMapView {
    let view = NMFNaverMapView()
    view.showZoomControls = false
    view.mapView.positionMode = .direction
    view.mapView.zoomLevel = 17
    return view
  }

  func updateUIView(_ uiView: NMFNaverMapView, context: Context) {}
}

class MapSceneViewModel: ObservableObject {

}
이렇게 설정하고 Run 하면,

다음과 같은 에러가 날 것이다.
Info.plist를 보면,

앱의 설정에 맞는 값을 추가해준다 . 네이버지도는 기본적으로는 사용자의 위치를 표시하지 않아서 따로 권한을 물어보지는 않는다.
""네이버 지도 SDK는 기본적으로 사용자의 위치 정보를 사용하지 않으므로 사용자에게 위치와 관련된 권한을 요구하지 않습니다. 따라서 위치 추적 기능을 사용하고자 하는 앱은 info.plist에 NSLocationAlwaysUsageDescription또는 NSLocationWhenInUseUsageDescription 권한을 명시해야 합니다.""
그런데 Privacy - Location Always Usage Description로 했더니, 이러한 에러가 났다. Always로는 쓸 수 없다는건가..? (혼란)

=> 제가 도큐먼트를 제대로 보지 않아서 생긴 오해였습니다.. 저거는 macOS용이고 iOS에서는 AlwaysWhenInUse나 그런걸 써야합니다!!

이렇게!!
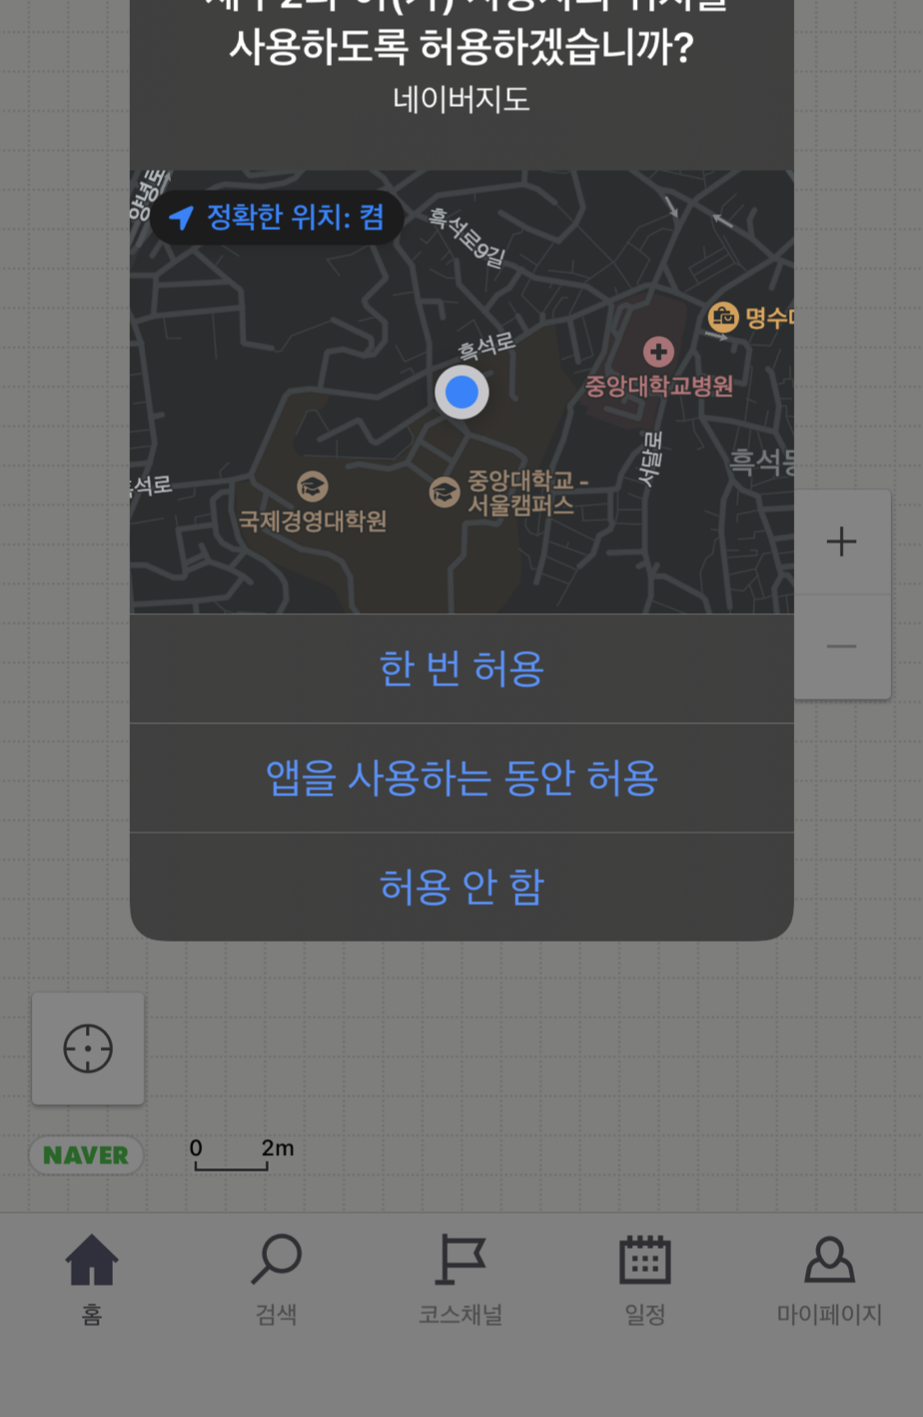
하니까 지도가 뜨는 뷰로 들어갈 때 권한을 물어봤다.

그러면 지도가 표시된다.
NMFMapView를 사용해도 되고, NMFNaverMapView를 사용해도 되는데 NMFNaverMapView가 기본 세팅이 되어 있으므로 그걸 사용했다.
만약 아예 위치정보를 받아오지 않을거라면,
//    view.showLocationButton = true
//    view.mapView.positionMode = .direction
이 정보들은 쓰면 안된다.
2. Delegate 설정하기?

기존에 하던 방식으로 delegate사용을 위해서 context.coordinator을 전달해주려고 했더니 에러가 발생했다.
  class Coordinator: NSObject, NMFMapViewTouchDelegate, NMFMapViewCameraDelegate, NMFMapViewOptionDelegate {
    @ObservedObject var viewModel: MapSceneViewModel
    var cancellable = Set<AnyCancellable>()

    init(viewModel: MapSceneViewModel) {
      self.viewModel = viewModel
    }

    func mapView(_ mapView: NMFMapView, didTapMap latlng: NMGLatLng, point: CGPoint) {
      // 마커 아닌 곳 탭하면 하단뷰 닫아준다.
      viewModel.isBottomPageUp = false
    }
  }
이런식으로, 각각의 delegate 클래스를 만들고, addCameraDelegate같은 함수를 통해서 추가해주면 된다! (makeUIView에서)
    // delegate채택
    view.mapView.touchDelegate = context.coordinator
    view.mapView.addCameraDelegate(delegate: context.coordinator)
view.mapView.addOptionDelegate(delegate: context.coordinator)여기를 참고하면, init하는 변수로 Binding도 사용할 수 있다는걸 볼 수 있다.
3. 마커 설정하기
마커 하나를 추가하는건 간단하다.
    let marker = NMFMarker()
    marker.position = NMGLatLng(lat: 33.361425, lng: 126.529418)
    marker.mapView = view.mapView
    marker.iconImage = NMFOverlayImage(name: "orem")
    marker.iconTintColor = UIColor.red
    marker.width = 25
    marker.height = 40
네이버지도는 전체 마커를 리턴해주는 기능이 없어서 내가 직접 관리해야 한다!!!!! 다행히 지금까지 작업하면서 그럴일은 없었다.
터치 이벤트 받기
  func addMarker(_ mapView: NMFNaverMapView, place: Place) {
    // 마커 생성하기
    let marker = placeToMarker(mapView, place: place)

    // 마커 userInfo에 placeId 저장하기
    marker.userInfo = ["placeId": place.placeId]
    marker.mapView = mapView.mapView

    // 터치 이벤트 설정
    marker.touchHandler = { (overlay) -> Bool in
      print("마커 터치")
      print(overlay.userInfo["placeId"] ?? "placeId없음")
      viewModel.place = place
      viewModel.placeId = overlay.userInfo["placeId"] as! String
      viewModel.isBottomPageUp = true
      return true
    }
  }
'터치 이벤트 설정' 에서 써있는것처럼 하면 된다.
4. 카메라 움직이기
카메라 == 지도에서 위치 라고 생각하면 된다.
나같은 경우에는, 일단 처음에 지도에 진입하면 특정 위치(초기점)으로 가야 했고, 마커를 클릭하면 포커스가 되어야 했다.
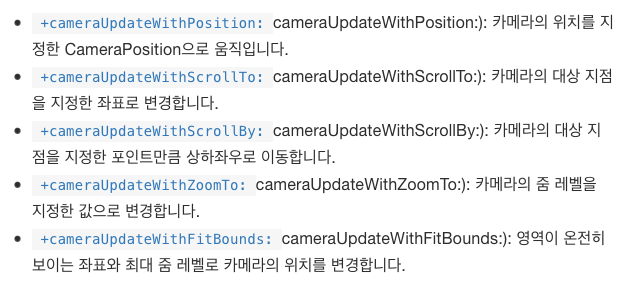
NMFCameraUpdate 객체에서는

이렇게 다섯개의 함수를 쓸 수 있는데 그중에 첫번째, 네번째 함수만 사용했다.
 // 위치 설정하기
    viewModel.$centerPosition
      .sink {
        let cameraUpdate = NMFCameraUpdate(scrollTo: $0)
        view.mapView.moveCamera(cameraUpdate)
      }
      .store(in: &coordinator.cancellable)
5. 코드 전문
import Combine
import NMapsMap
import SwiftUI
import UIKit

struct NaverMapScene: View {
  @Environment(\.presentationMode) var presentationMode: Binding<PresentationMode>
  @ObservedObject var viewModel: NaverMapSceneViewModel

  var body: some View {
    ZStack(alignment: .bottom) {
      VStack(spacing: 0) {
        PathMapView(viewModel: viewModel)
      }

      Text("")
        .frame(width: 0, height: 0)
    }
  }
}

struct NaverMapView: UIViewRepresentable {
  @ObservedObject var viewModel: NaverMapSceneViewModel
  func makeUIView(context: Context) -> NMFNaverMapView {
    let view = NMFNaverMapView()

    // delegate채택
    view.mapView.touchDelegate = context.coordinator
    view.mapView.addCameraDelegate(delegate: context.coordinator)
    view.mapView.addOptionDelegate(delegate: context.coordinator)

    return view
  }

  func updateUIView(_ uiView: NMFNaverMapView, context: Context) {}

  class Coordinator: NSObject, NMFMapViewTouchDelegate, NMFMapViewCameraDelegate, NMFMapViewOptionDelegate {
    @ObservedObject var viewModel: PathMapSceneViewModel
    var cancellable = Set<AnyCancellable>()

    init(viewModel: NaverMapSceneViewModel) {
      self.viewModel = viewModel
    }

    func mapView(_ mapView: NMFMapView, didTapMap latlng: NMGLatLng, point: CGPoint) {
      // 맵뷰 액션들 넣어주기
    }
  }

  func makeCoordinator() -> Coordinator {
    return Coordinator(viewModel: viewModel)
  }
}
'macOS, iOS' 카테고리의 다른 글
| [iOS] iPad에서도 아이폰 앱처럼 보이게 하는 법 (0) | 2021.03.20 |
|---|---|
| [XCode] wakatime (0) | 2021.03.18 |
| [SwiftUI] Scrollview pagination하기 (0) | 2021.03.17 |
| [SwiftUI] .navigationBarHidden(true)로 해도 생기는 여백 없애기 (1) | 2021.03.16 |
| [iOS] Picasso의 iOS버전 - KingFisher (0) | 2021.03.15 |
